Monday 27 October 2014

Padding! Practise makes perfect!


I have been very excited to start padding as my favourite hair style is a volumed 'big hair' look.
Also most women in the Elizabethan Era had Volumed padded out hair.

This was my very first attempt at parting and curling the hair before i put the padding in. I was very happy with this as my first time. Although next time i need to make sure i get the parting correct. The parting in this photograph is not inline with the nose as i did not take this into consideration. However i have put the tail of the comb on the head where the parting should be next time. Practice makes perfect!

Below is a practise of what 'could' be a final design of my Elizabethan hair. Obviously there is room for perfecting this. I took about an inch for the forehead to curl, and the rest i have crimped to give the hair more volume before i put the padding in. I have chose to do this hairstyle as in the Elizabethan Era they had padded out hair with crimps and curls. This however, was my first time using padding and i am happy with this.
Below is one of my favourite styles i have created. Here i have created this look by crimping the hair from an inch after the hairline starts then placed padding under the crimped hair. I then curled the front with barrel curls and turned them into pin curls. I like the idea i have created here so much i think it would be great to used as my final hair outcome. I was also thinking of placing pearls in every pin curls to make this a more elaborated look.


Heart shaped padding

We have also been looking at the Elizabethan Heart shaped hair. This was very popular in the elizabethan Era, especially for the high class people and noble people.

In todays lesson I created a heart shaped Elizabethan style hair using padding and crimping, I also made a bun under the padding.

Today I started by sectioning the hair. I sectioned the hair across from ear to ear. Then i crimped the front section of the hair. I crimped the front section of the hair as this is a very Elizabethan look and crimping makes the hair thinker so the padding would be hidden more.


This shows the front section of the hair crimped:                    This shows the sectioning of the hair clearer:

This is the bun I made, i made this using the barrel curl technique that is in the bun post. I made a bun as at the end result I will be hiding the front section of the hair under the bun the hide it once the hair has gone over the padding:


The photograph below shows how I made a plait to support the padding. I started from just about the crown on the head to right and as my model had long hair I had to bring the plait back onto itself again.
The reason I made this plait is so when I put the curbie grips into the tights i can also put the grip through the plait. This makes the padding secure so the hair does not fall out.
I only put the grip through the plait half way because I need to turn the grip round. This also makes the padding more secure.


The photograph below shows my positioning of the padding on the head. This is also what the padding looks like. In this padding I have used couch roll and I have put this in tights.


After I had the padding in place I brought the back of the hair that was under the plaits over the front of the padding to hide that hair and give the hair extra volume and to also hide the padding.


The is the same photograph stage as above, but different view:


Below i have repeated the other side of the head and bought the hair together. You can see that there is a gap in the middle of the hair. This is because I have placed the padding on the hair too far back.


Below I have opened the middle of the hair to show you that I need to bring the padding closer to the hair in future.


This shows you the parting clearly.


I was very please with my first attempt of the heart shaped hair done with padding. I am very pleased as this is my first attempt of the whole style.

In the future, to make this style look more professional, I will apply the padding first and then create the bun after. This is because in this class I did the bun first and I ruined the bun through the process of applying the padding.


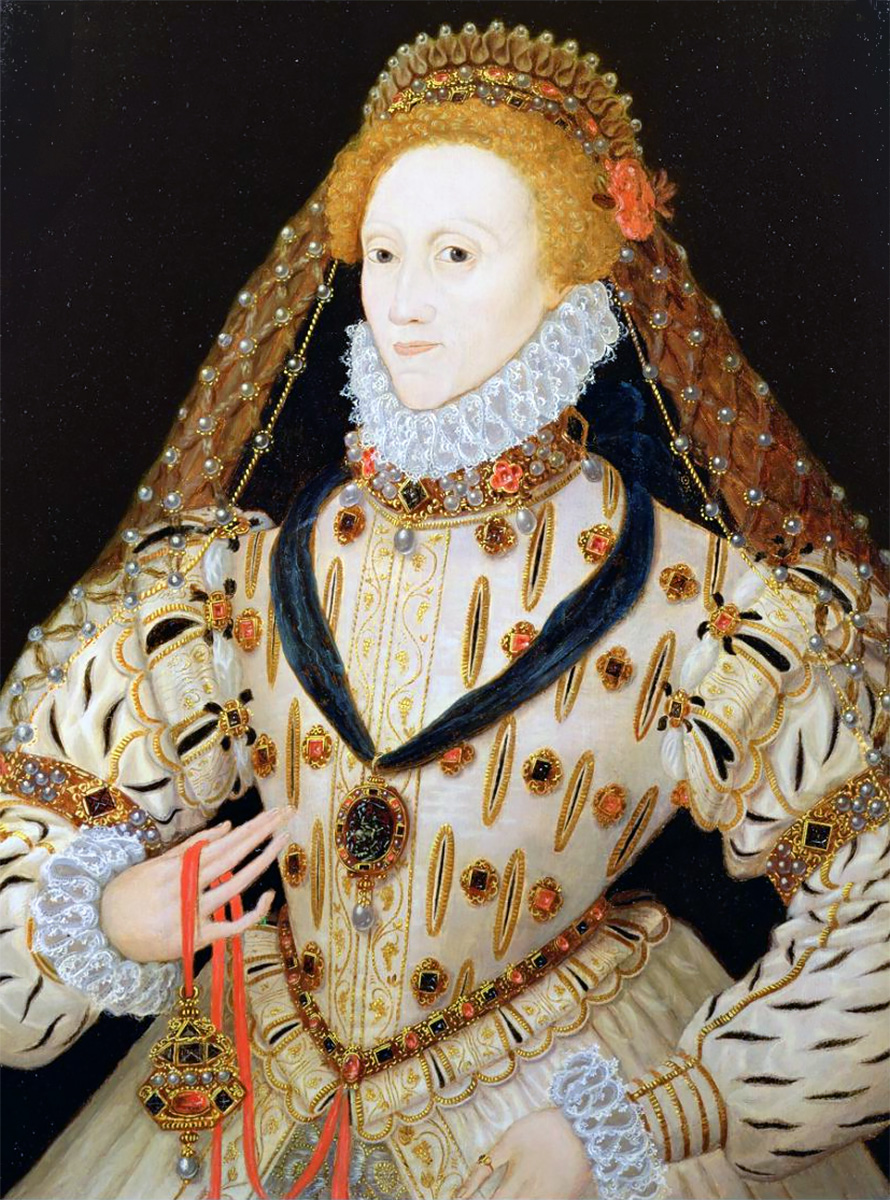
Padding that was worn in the Elizabethan Era

Heart-Shaped padding

"The Ermine Portrait" 
by an Unknown Artist, c. 1585
[Viewed on 4th December]

Above is an example of a heart-shaped padding. We only really have heart shaped padding now on catwalks and shows. This is not an everyday hairstyle anymore for this Era. However, this was very popular in the Elizabethan Times.


Round padding


Armada Portrait, c.1590.
Artist Unknown.
[Viewed on 4th December 2014]


Above is the "Armada Portrait". You can see here how their hair used to look in a round-shaped padding.

Frizzing!


In this lesson we have covered frizzing. I have enjoyed this lesson as i have never tried this technique before and i think it is a very Elizabethan look.


Step by step guide to frizzing:

Step 1. Section the hair
Get a square section from the area that you want to frizz.

Step 2. 
Figure of 8
Place the hair in the clip and twist the hair around the clip going round in figures of 8

Step 3. Adding another clip if hair is too long
Once you are nearly at the end twist the little wispy bits round the clips, when you hold the straighteners on the hair it will stay in place, if the hair is too long then use another clip and carry on with the figure of 8.

Step 4. Straighteners time
Press some hair straighteners down on the twists, the heat keep the figures of 8 in place and flatten the pattern.

Step 5.

Leave the pins in until the hair has cooled, then pull the hair out of the clip.

Step 6. 
Continue these steps all round the head.

Step 7. Final outcome
Once the whole head is done and the clips have been taken out, brush through the hair to create a frizzing effect, this goes body and a very elizabethan look.

Below is one of my first figures of 8. I am very please with this as it is very neat and their are no loose hairs.
Below i have done to show you that the hair was too long to go round the clip so i have added anything clip and carried on with the figure of 8.
The two pictures below i have taken the clip out, before i have brushed the hair out too.
Below is my figures of 8 brushed out
 This is my finishing look, the figures of 8 brushed out makes the hair look frizzy and there is a lot of volume too. This is a very Elizabethan style.


Elizabethan Portraits with Frizz


"The Rainbow Portrait"
Painted by Henry Bone R.A.
      Portrait of Queen Elizabeth I (1533 - 1603)
Available on: www.marileecody.com
[viewed on December 2014]


This is the Portrait of Queen Elizabeth I (1533-1603) The rainbow portrait. This is most probably one of the most colourful Tudor portraits. I cannot believe that Queen Elizabeth was getting on for her 70's in this portrait. she has hid her age so much.
I personally think that this portrait makes her look so young as this is what Queen Elizabeth wants us to remember her by.
This portrait is proof that in the Elizabethan Era they used to wear there hair in a crimped style as this was the fashion. Also an application of padding has been applied to give the hair a bit of volume. To finish the hair style, the hair has been decorated with pearls.
In this portrait Queen Elizabeth I is wearing a bodice which is decorated with flowers, three pearl necklace, several bracelets, a brooch in the form of a cross and a fantastic ornate head-dress. This makes the Queen look very elegant and you can tell she is important.

Curling and Crimping!


Curling

Equipment:

-Curler
-Grips
-Clips
-Tail comb
-Brush

In this lesson we were taught how to do curling and crimping in an Elizabethan Era way. So we was shown a small demo of the procedure at first.
We had to curl one side of the head and them crimp the other side. Then we had to brush the hair out after to see the affect.

This is my curls i did. However next time i will curl going alternative ways, as the curls will become bigger and more messier.

This is the second layer of my curls, this layer i have got in alternative order to achieve a bigger look at the end


 This is a photograph of my curls brushed out. I was very happy with this look as it was my first time with the tight curls.


Crimping

I really enjoyed crimping as i used to crimp my hair when i was a little girl and it reminded me of old times.

This is my crimped hair before i brushed it out to get the affect.

Here i have brushed out the crimps and i am holding the hair like this to show how much body crimping your hair gives you


 This is the finished look and i am very happy with the outcome


Below are some Elizabethan Portraits with their hair crimped


Elizabethan hair that has been crimped and curled


Queen Elizabeth I, c. 1580.
Artist Unknown.
Private Collection.
[Viewed 4 December 2014]


Unfortunately the Artist for this portrait is unknown. This proves that in the Elizabethan Era the crimped hair style was in fashion.


This is a contemporary image of a historically correct hairstyle:

Anne-Marie Duff portraying The Virgin Queen
[Viewed on December 2014]


The image above is a contemporary image showing us a hairstyle from the Elizabethan Era. This picture shows curls around the hairline into pin curls. There is also padding used in this image for volume.


Below is a portrait of Queen Elizabeth showing how the curls used to be in that Era

The Ermine Portrait
Nicholas Hilliard, 1585
[Viewed on December 2014]


This portrait shows curls in the hair and how a curled hairstyle looked in the Elizabethan Era. Also a heart shaped padding with jewels on top of the heart shaped padding. This hair is a tight curled look.


Contemporary Crimping and Curling
Taylor Swift
Photo by Gregg DeGuire/WireImage for NARAS
[Viewed on December 2014]


The image above is an image of Taylor Swift with curly hair. This image shows how different the curls have changed throughout the years. The curls used to be tight, flat to the head. now the curls are looser and they dangle down.


Stacy Ann Ferguson
[Viewed on December 2014]


Above is an image of Stacy Ann Ferguson (as we know her, Fergie). This photo shows how the crimping has stayed the same since the Elizabethan times. But, they would have padding on their images in them times. Nowadays, the hairstyles are smaller and flatter on the head.


Sources
http://www.celebwigs.com/fergie-crimped-style-long-lace-front-wig-5-shades-yaki-wave-wigs/

Tuesday 21 October 2014

Elizabethan Hair & Research!

Elizabethan Hair and Research


Elizabethan Hair and research

My idea of Elizabethan hair is characterised by frizzy or tight curled hair creating a heart shaped frame around the head with plenty of body and covered in pearls.
This ideal Elizabethan woman was a woman with light, reddish hair, preferably natural. As this was inspired by the Queen herself, her favoured hair style was to be frizzy. The red hair look was a fashion started by the nobility of the Elizabethan Era.
The upper class women would follow the red hair look by dying their hair reddish, yellow with a mixture of Saffron, Cumin seed, Celandine and oil. If people didn't have the desired type of hair it was rumoured that women would get their hair from horses or even children's hair as wigs only become fashionable in the last century and introduces in England around 1572. Wigs (referred to as Periwigs back in Elizabethan Era) were very popular back in Elizabethan time, as Elizabeth I had over 80 wigs.
Fringes were not in fashion in the Elizabethan Era as it was a desired look for the hair to by away from the forehead.
During the Elizabethan Era the woman would show more hair as the head coverings would become smaller, but more delicate.
Ruffs and Collars were also very popular and high in fashion in the Elizabethan Era as they were very elaborate and framed the face. 
Ruffs and Collars are constructed on gauze wings which were raised at the back of the head.
Woman kept their hair long and flowing down their backs before marriage, this was the sign of a 'Virgin Queen', this is also the favoured hairstyle for brides on their wedding day, but with fresh flowers also in the hair. Once they were married they would have their hair up in very elaborate styles with very with elaborate headdresses on their heads.
After marriage a lot of the woman's hair was covered by a sort of head covering pinned to the hair as it would be dressed in a bun.
Head coverings were normally a hat, veil, coif or a caul or french hood as this dictated the hairstyle
The style of the head covering dictated the hairstyle. Many of the hats were adorned with feathers, pearls, glass jewels, spangles, gold thread, embroidery and lace.

The different hair styles we influence by the Queen, while health problems related to the beauty products available at the time had an influence on hair styling.

Mens hair

Until the 1590's men kept their hair short, after then the fashion was a shoulder-length look, but a curled style created using an iron. The curls were called "lovelocks' which would have had perfume, wax or starched on them.
Most men would have had some sort of facial hair, whether this would of been a must ache or a beard, these were however trimmed at a point.
Hats were in fashionable for the men, they wore them to obscure their hair. These hats were usually made of wool, fabric or leather.
However if a man was bald they would wear a light-colour wig.

Below is a portrait of an example of the hat the men wore in the Elizabethan Era

An Unknown Man
 by Jan Gossaert, c.1525-28. 
(Gemäldegalerie, Berlin)
[Viewed on 5 December 2014]

More facts and nots I have learn about the Elizabethan hair

-Elizabethan women kept their hair long so they can achieve the big and extravagant hairstyles

-Red was the ideal hair colour because they thought light colours like red represented the beauty of women

-The most popular Elizabethan hairstyle was their hair on the front and the top of the head was parted on the centre, and the hair on the back of the head one unit with the back section braided and in a bun to for a head covering to fit on. The front section was then frizzy or pin curled.


Below is a photograph of my work from a previous prosthetic course. I feel this is necessary to add as it reminds me of the Elizabethan Era and the fact that they would shave off all their hair if they did not have the desire Red hair colour. 
If they were wealthy enough they would then place a red wig on their bald head.
Shame my model below still has her eyebrow on though.


Prosthetic Make-up Artist-Sarah-Louise Leftly
Model-Carlotta Nuti
Trained at Delamar Academy


Facts and interesting information

To make hair and body hair grow

If you get barley bread sand salt together and toast them, then grind them together to make a powder, then take bear fat and mix it together to create an oil, then place the oil where you want the hair to grow.


To make hair grow and beards long

Take borax water, fumitory water, water of plantain and with this water wash where you want and take a comb and you will see the effect.


To achieve the design golden Elizabethan look

-4 ounces of the herb called Great Centaury [Centaureum erythreum], 

-1 litre alum of [potassium bitartrate?], 2on. litres of gum Arabic, 1 on. rock alum, -7L. with water and mash well and make an elixir of it and boil until 1/3 is left; 
-strain and with this oil then comb the hair under the hot sun and first wash your head & rub well then comb.


http://www.elizabethan-era.org.uk/elizabethan-hair-styles.htm
https://sites.eca.ed.ac.uk/renaissancecosmetics/cosmetics-recipes/hair/


Sunday 19 October 2014

Buns and Plaits-Weeks 2


In this lesson we had to cover basic plaits, French Plaits, Fishtail plaits and Buns.
Ive never been that confident in hair but lessons with Lottie make us feel so comfortable and I've learnt so much

Basin plaits

My work and how i achieved this:
Separate the bit of hair that you want plaited form the rest of your hair
 Divide that section of hair into 3 parts
Keep overlap the end strands in the middle
Until you have something that looks like this


This is a more clearer way of shower you how to make a plait:


http://women-hairstyles.net/how-to-make-a-french-braid-step-by-step-instructions.html

Step 1. Prepare the hair.
Brush all the tangles out making the hair soft and easy to style.

Step 2. Separate the hair.
Separate the ponytail into three equal strands. Hold two strands in your right hand. Hold the third strand in your left hand.

Step 3. Start the Plait.
This makes the right strand now in the middle and the middle strand on the right. Then switch hands and hold the right hand in the middle strand and left strand in the left hand. 

Step 4. Carry on with step three until you have no hair left, then put a hair bobble at the end of the plait. this holds the hair in place.


Very please with my first attempt of a french plait:


A step by step guide of how to make a french plait:


Step by step in more detail.

Step 1. Prepare your hair. 
Make sure you brush out all the tangles. brushing your hair will also make the hair softer and easier to style.

Step 2. Section you hair. 
Take three chunks of hair of the section of hair you are french plaiting. All three sections of hair should be the same size as this will make the plait even and neat.

Step 3. Begin to plait the hair. 
Take your three sections so that two strands are held in one hand and the third strand is in the other hand separate from the other strands. Create a few rows of crosses. So the strand on the right crosses over to the centre, then the strand on the left crosses over to the centre.

Step 4. Incorporate in new hair. 
Continue step 3 but then gradually add other pieces of hair. Every time you go to cross a strand over to the other side grab a different stand of hair from the loose head and include it in the cross over.

-The size of the added in pieces of hair doesn't matter, but the smaller the better the french plait will look.
-Make sure you used the pieces of hair from the front of your head so you not left with loose strands of hair near your face.

Step 5. Incorporate all of your hair into the plait.
Continue step four until you run out of hair and all the extra hair is drawn back into the plait.

Step 6. Finish the French Plait.
You may need to continue into a regular plait towards the end of the french plait depending on the length of the hair. Put a hair bobble in the end of the hair to keep the french plait secure and in place. Avoid using rubber bands as these can break you hair and give you split ends.


Fishtail Plaits


As this picture isn't that clear, this is a step by step guide of how to achieve a Fishtail Plait.

Step 1. Divide the section of hair you are working on into two bits. For a neater look, use a comb to part, for a messy look fishtail use your hands to part.

Step 2. Pull a thin strand of hair from the outside on one of the two sections, pull it over the top of the other section. Make sure that the left strand goes over the right strand and the right strand goes over the let strand.

-try to use the same thickness for each strand for an even look.
-my personal thoughts are that smaller strands the whole way though looks a lot better than if you would use bigger strands.

Step 3. Repeat step 2 but starting with the other strand.

Step 4. Cary on going from each side until you run out of hair at the bottom of your plait.

Step 5. Add a thin bobble to the end of the hair to prevent the hair from falling out. 
-You can alway massage the fishtail plait at the end to loosen the plait if you make it too tight.


Buns


Step 1. Sectioning hair
Section the top of your hair off from the bottom.

Step 2. Make a ponytail from the top hair that you sectioned.

step 3. Take your first section of the ponytail and back comb that section from middle ponytail towards the head. this allowed the section of the ponytail to stand up and gives it depth so you can curl it better (you will need four sections)

Step 4. Smooth the top section of the hair to make this smooth them curl the hair over to make a barrel curl. Make sure the barrel curl is not wonky and is inline with the nose, clip down onto the head with a strength clip, with the flat side of the clip upwards.

Step 5. Apply this method for all four sections then once you have done this blend all of the four sections into each other so there are no gaps.